Logistics you must know in order to start beekeeping
Learn how to start beekeeping BEFORE you invest your time, money and energy! Learn what equipment you have to have, how to set up your hives, how to choose the right bee breed, and so much more in order to get started beekeeping.
This post contains affiliate links, which means I make a small commission at no extra cost to you. See my full disclosure here.
What terminology you should know about to start beekeeping
First, I would recommend reading these two posts to become familiar with some beekeeping terminology:
Check out how to start beekeeping for beginners to find out What things do you need to get started beekeeping.
Logistics you must know in order to start beekeeping
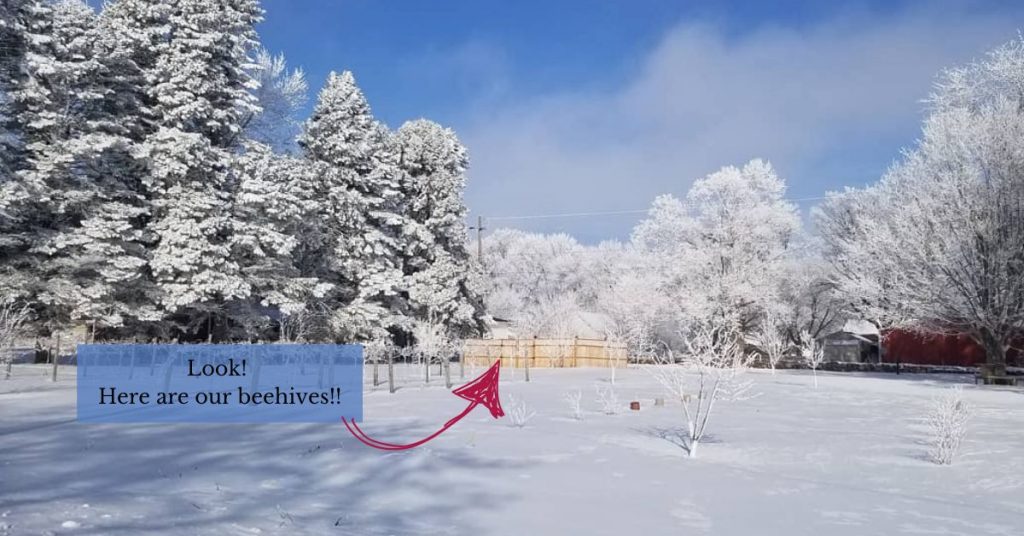
There are some things you should take into consideration when deciding where to place your bees. You may want to ask yourself the following questions:
- Do I plan to overwinter in Iowa (or really anywhere in the Midwest)? This is just a fancy way of saying, “will you do what it takes to help the bees survive a winter where you’re living?”
- You may want to consider some other things if you are thinking about overwintering bees:
- Do you have a windbreak or some way of sheltering the bees from the wind?
- *Hint* You more than likely do! Even small trees, shrubs and bushes that are 4-5 ft will do the trick. Try to place them so the wind is the most blocked from the north and west. The more wind protection, the better though! Most beekeepers wrap their hives in the winter, especially if they live in a place that gets a lot of wind. This can be done with coroplast (which is like heavy duty, double walled, cardboard, but in plastic form) or with tar paper. I personally didn’t like using tar paper, but other beekeepers swear by it.
- In the winter time you’ll want to provide an emergency sugar stash for the bees, as well as plenty of ventilation. I like to use a vivaldi board (more on this in the next post), quilt box, or some other means for warm air to escape, and condensate above the bees, without the moisture dripping back down on them.
- Most beekeepers say that if you make it through winter with 50% of your hives, you’re doing great. I’ve experienced years where I’ve lost more than that, about that, and then have been really successful with overwintering over 100% of my hives (I had a winter swarm). Just like with any livestock, garden, or other homesteading project, you need to keep trying and working at it to get better at it. Keep your head up, and keep trucking along. Figure out what worked well, what didn’t, take notes, and keep trying. Sometimes you just have to jump in with both feet, get wet, dirty, and tired, and figure it out as you go. No sense in dreaming about your feet in the sand, you won’t make any progress.
- Do you have the means to provide sugar syrup to bees? Sugar syrup is the sticky liquid that is a mixture of sugar and water that beekeepers make to feed to the bees to give them enough food to survive the winter. Most beekeepers weigh the sugar to water as a ratio. The bees will get a mixture of 2:1 in the fall (2 parts sugar to one part water), and 1:1 (one part sugar to one part water) in the spring. For example if I’m making a 2:1 mixture I might use something like six pounds of sugar to three pounds of water. If I was making a 1:1 mixture I might use something like four pounds of sugar to four pounds of water.
- *Hint* You do! Even a gallon ziplock bag will work for this if you don’t want to invest in a specific feeder! You will need some sort of spacer. A spacer is just that. A thing, a board “frame” usually that creates space between the top of the deep box and the lid/cover of your hive.

- Do I plan on sending my bees to California to make me millions of dollars pollinating almond trees?
- *Hint* Probably not. This sounds like THE dream, doesn’t it?! I’ll keep my bees here in the summer, collect all of their honey to eat and sell, and then send them away for another summer in California, AND get paid for it! Pump the brakes, and slow down. If you’re thinking about having less than 50 hives, you probably aren’t the best candidate for sending your bees to California.
Things to take into consideration if you’re sending bees to California
- Do you have a way of getting your bees there? Many people use semi trailers and special drivers to get them there. So, do you have a forklift? Do you have a driver?
- Do you have a logistics coordinator in California that tells you where to put your bees?
- If you want to see some amazing beekeeping, and how they do large scale beekeeping. Check out Foley’s Russian Bees out of Indianola, Iowa. They send their bees to California along with several other beekeepers in the Des Moines, Iowa area.
- Do you have the ability to pay someone to manage your bees in California, and/or do you have the time, money and resources to go check on them in California?
- Are your bees healthy enough? You need to have a state inspection – which anyone can do at any time by the way. You just need to schedule a time to do this. I highly recommend doing this at some point so you can learn too!
- Do you have the time, energy, and resources to split your bees in California and when they get back home?
- Do you have a large enough market to sell all of your honey and wax products?
Alright so, back to reality…If you plan on overwintering your bees in Iowa or the Midwest I would recommend ideally finding a place that serves both the summer and winter needs. See below about what bees need to survive.
What do bees need to survive
- Water – bees must have water to survive. They are living creatures, and if they’re alive, they need water. Some sources say that a strong hive will drink over a quart of water a day. Let’s break this down for a minute…Let’s say you have four hives, and you work a full time job that really only allows you to check on your bees once a week. That’s 4 quarts of water per day, times 7 days, that’s 28 quarts, or 7 gallons of water in a week. That is not taking into account if another animal comes and drinks the water you put out. It doesn’t account for the loss by evaporation, or shoot..what if something spills or breaks your water set up! *GASP!*
- In my opinion, it is best if the bees don’t have to rely on us to provide water for them. Place them by a water source – like a creek, stream, or river. Yes there are things you can do to provide them water – like a shallow dish with rocks and pebbles in the bottom, or a stock tank with pool noodles and other styrofoam..but, wouldn’t you rather drink fresh, moving water, that isn’t sitting stagnant in some slimy, green, HOT tank?! Yeah..that’s what I thought…So, bees need water, and more than YOU think, because, they’re livestock, that’s what living things need for basic life functions.
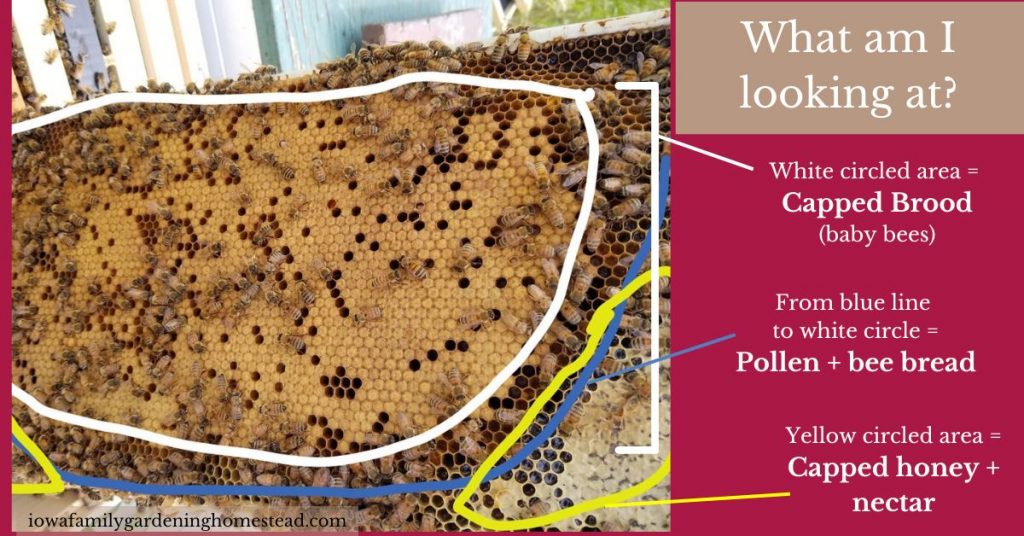
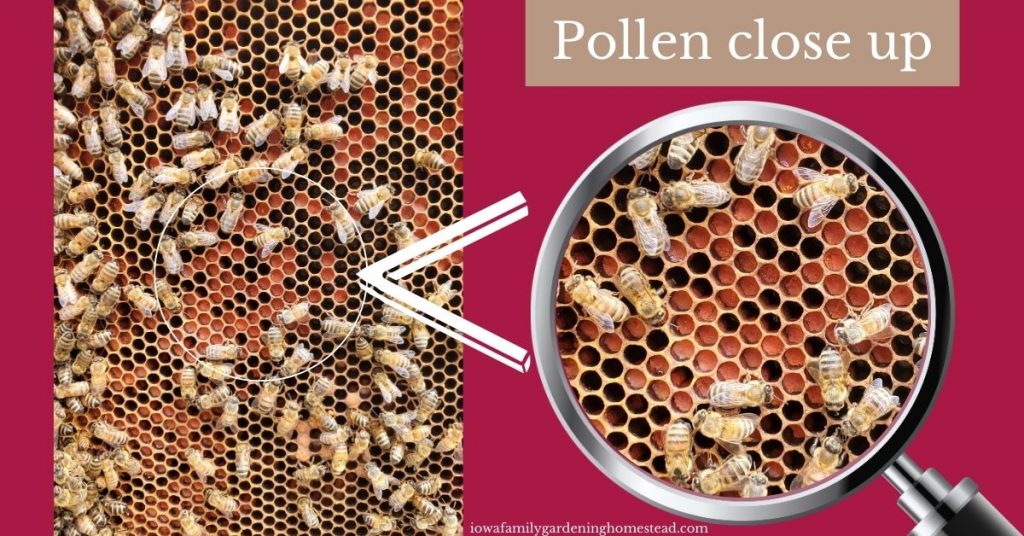
- Pollen – bees need pollen during certain times of the year. They need pollen to be able to feed it to the queen in the spring to trigger the natural response of, “Hey girl! It’s time to make babies!” So, it comes in handy to feed pollen as a thing, called a pollen patty, again, in the spring after it’s above freezing for a couple of weeks.. HillCo, LLC has pollen patties, Dadant has pollen patties, MannLake has pollen patties. Pretty much any bee supplier you go to will likely have pollen patties – a mixture of protein, fat and carbohydrates, which are things we all need too, right?! Pollen patties are an extra thing, but really good thing to help bees get kick started in the spring. With our shorter growing season (Zone 5a), it’s really helpful to give your bees a little kick start so they can boost their population, and get enough forager bees out to start bringing in nectar to make honey. When honeybees can bring in pollen from their surroundings you do not need to supplement, but until then, it is a really great idea, in my opinion. Different kinds of pollen put out different colors, from yellow to white, orange to red and even purple. If you want to get an idea of what your girls might be bringing in just search for a “pollen color spectrum” visual, like this one from MyBeeLine or Eversweet Apiaries to name a couple. There are so many other visuals out there!
- Nectar – Ok, so bees have to eat something. We have already established they are living creatures that take water. Therefore, they need some source of energy. Energy that bees take in typically comes as nectar. Nectar is the carbohydrate-rich liquid that oozes out of a flower. Remember, carbohydrates are sugars. Nectar is basically a disaccharide (sucrose) and two monosaccharides (glucose and fructose) according to the NIH. The flower biologically has this component to attract pollinators, isn’t that AMAZING! God designed flowers to attract pollinators, and pollinators need the stuff flowers secret. A-MAZ-ING!
- Let’s take a time out to explain what honey is then. Honey is the dehydrated, nectar, vomit that has been passed from bee to bee and fanned by a bees wings (over their butts, I wonder if they fart-hmm) to the perfect percentage of H20 (water) to get us this sticky, golden, delicious semi-liquid, semi-solid stuff called honey. Got it. Ok. So, nectar from the flower, sucked up, spit out, fanned, stored, turns to honey. Got it. K.
- When there isn’t a source of nectar bees still need to eat. What season of the year is it where flowers aren’t blooming? ….You got it…right?! WINTER. So, in order to prepare the bees for this season of winter beekeepers feed sugar syrup to their bees in hopes that they will make it through the winter based on what they stored. Bees can do another thing that is pretty cool. Bees can convert regular white table sugar (granulated sugar) into energy. They can also pack it into cells to use for food. They can use granulated sugar as an “emergency food source.” Many beekeepers put a layer of granulated sugar on the top of their hives. This also allows excess moisture to be absorbed, keeping the bees dry. The saying goes, “the cold doesn’t kill bees, the moisture does.”
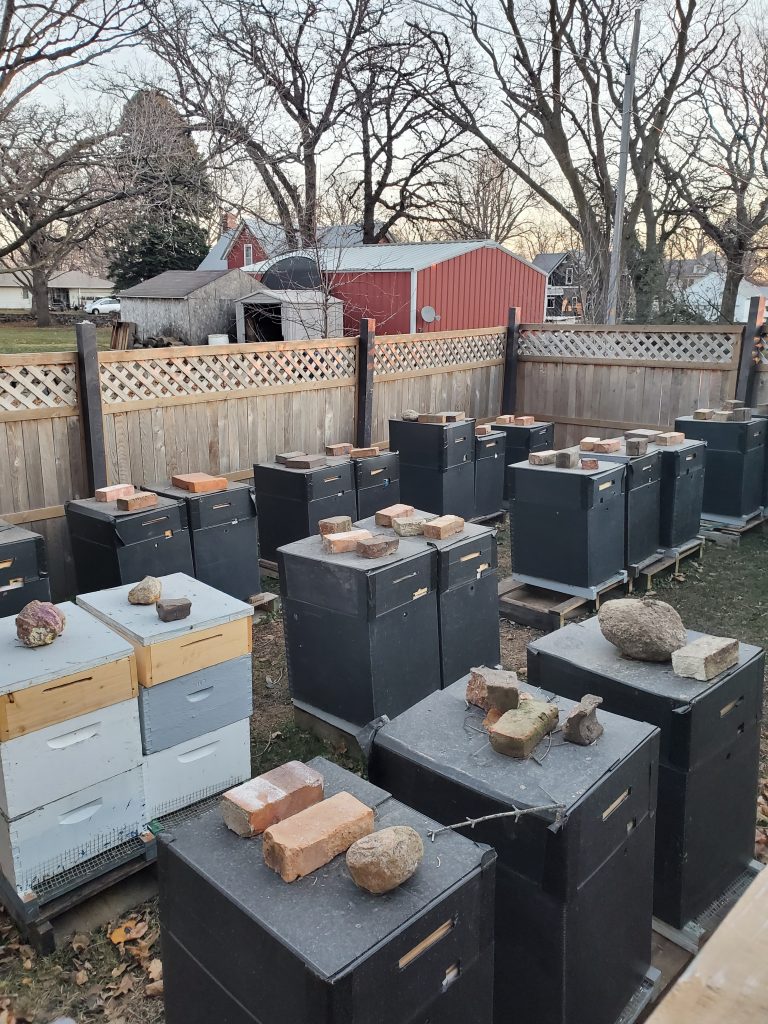
- Home- bees need a place to call home. If you’re a beekeeper, ideally this will be in your hives (or a swarm trap you put up-more on swarm traps in another lesson)! If you’re going the route of a typical, traditional beekeeper we can talk more about how to set up your hive below. Before I started beekeeping I thought I was going to own a Flow Hive because it would be “so easy for me.” The thought is right, easy for me, bad for the bees. So, in the end, we made the decision that was better for the bees. Please, do not purchase a Flow Hive, without speaking to a real beekeeper, and witnessing how a hive first hand. Thank you.
How to set up your bee hives for beginners
Now that you have thought about where you are going to place your hive, and what bees need to survive, let’s talk about actually setting up a hive. The typical beekeeping components most beekeepers talk about is the Langstroth Hive, in case you’re wondering. There are other types you might hear about (Warre hive, top bar hive, WBC hive), but for this post, we are talking about the Langstroth hive, which are the traditional rectangular boxes you may have seen.
The most basic components of the hive, I also talk about in Terminology you should know about beekeeping, but we’ll list it out here as well:

- Layout of a hive (from bottom to top)
- Bottom board, two deep boxes, queen excluder (optional), honey super(s), vivaldi board/quilt box (for winter-optional), telescoping inner cover (optional), cover
- Bottom board – the board that the hive sits on. It will often have a landing space for the bees to get in and out of the hive (think of a runway for airplanes)
- Brood box or deep box – usually two boxes that contain ten frames each, that contain the brood
- Queen excluder- this optional piece of equipment does sometimes come in handy when making splits (I’ll talk about what a split is in Part 2), or if you for sure want to keep the queen out of your honey supers. It can be metal or plastic. We opted for metal for longer use. You will place this piece between the boxes in order to keep the queen from moving up to a higher box
- Fun fact-if they get a ton of wax buildup on them, set them in a freezer for about 24 hours, take them outside and bang it on the ground. The wax will mostly shatter and fall off!
- Honey super or super – the box that the bees will store their excess honey. These are the boxes that beekeepers will harvest yummy honey from to get to your bellies. These boxes are added on top of the two brood boxes. So, if putting it together from the bottom it’ll go – bottom board, two deep boxes, queen excluder (optional) then honey super. You add more supers when your bees have drawn out wax on most of the frames and are running out of space to store honey.
- Frame – each box in the hive contains frames in which the bees raise baby bees (brood) or store honey. Think of this like a picture frame. Inside of a frame, a piece of foundation fits in to give the bees a head start on their jobs.
- Each deep brood box contains ten frames
- Each honey super will contain nine frames. You will want to leave the extra space for the bees to draw out wax to fill with honey. Also, these boxes get REALLY heavy (40-80 lbs) full of honey
- You may choose to use spacers. These often metal fittings sit inside of the ridge of a honey super, under the frames, and are nailed in place, so you have precise spacing between frames. This, in my opinion, is an optional piece of equipment, but does make placing supers more speedy.
- Foundation – the wax, and sometimes wax and wire piece, that fits inside of a frame that the bees will draw out more wax to create cells on to house brood or honey. This often comes in yellow or black. I like black because they don’t look dirty, and don’t show wear as much, and because I can see the cream-colored eggs on it. I also think black looks sharp.
- Vivaldi board – an optional piece of equipment used to help pull moisture off and away from the hive, usually in winter time, to keep them from freezing and/or overheating. We line ours with burlap to wick up moisture. This goes directly on top of the top brood box.
- Telescoping Inner cover – or Inner Cover – the cover that is put directly on the inside of the top of a hive, under the top cover (in my opinion, not necessary)
- Top cover – the very outermost cover that protects that hive from the outside elements that goes on the top of your hive.
- Winter cover – the optional piece of tar paper or corrugated plastic used as a windbreak to put directly over a hive in the colder, winter months
- Mouse guard – a guard used to protect the hive against mice in the colder months and winter. If a mouse gets into the hive in the winter it will wreak havoc by eating through wax, etc. The bees may be able to fight it off, but not guaranteed, depending on how large the hive is and can break cluster. ¼ in hardware cloth also works for this.
- Cluster – when the bees get together in a group to conserve heat in the winter time
- Entrance reducer – a piece of equipment used to close off part of the entrance in order to stop robbers (see the Beekeeping Terminology Related to Bee Behavior section for details on robbing-Part 2), or to conserve heat in the wintertime
- Upper hive entrance – an entrance above the brood boxes that gives bees another access point besides the front hive entrance
- Hive stand – the thing that the hive sits on. Sometimes it is a physical stand, and other times it’s a pallet with a piece of plywood for the bottom, or bottom board
- Migratory pallet – the pallet that beekeepers use to ship beehives on. It usually contains space for four hives that contains U-clips that fits on the outside, and inside of the bottom brood box to prevent them from sliding off of the pallet
- Observation hive – a hive that has glass so viewers can get a look into the beehive without fear of being stung
How to choose the right bee breed for you
The famous beekeeping quote, if you ask a group of ten beekeepers, you’ll get 12 answers. (actually, every time I hear that joke, it’s more exaggerated! Haha!). How to choose the right bee breed for you will depend on your end goals with your bees. Here are some questions to ask yourself when finding “just the right kind.” Carolina Honey Bees has a good resource for pros and cons for each race/strain of honey bee
- Are you planning to overwinter in Iowa or send your bees to California?
- Do you have a preference on how the bee looks color-wise?
- Do you care what the bees’ demeanor is like?
- Do you want a lot or a little honey production? (I think I know your answer to this!)
- Do you care about treating your bees with chemicals when disease occurs? Ie-do you have a preference for “disease resistance”

Choosing the right bee breed for you might be different for your mentor, for your neighbor, and even for me. Choosing the bee breed that is right for you will depend on your goals for your operation. In my personal opinion, if you are going to overwinter bees in Iowa, you are going to want to choose bees from a supplier that has a great reputation, that has proven success for more than one year. You may want to check their Facebook pages and their websites for success stories from real people. You can find people in your local beekeeping club by going to the Iowa Honey Producers Association website and locating the Iowa Beekeeping Clubs. If you are located in Iowa, I highly recommend getting bee stock from your mentor, someone local to your area, checking out Bell Farm – Iowa Bees. You can see our Beekeeping in Iowa Spotlight on Ellen Bell of Bell Farm here. I have witnessed superior bee stock from these bees, and highly recommend them. Kind of like with other types of livestock, you may have to try out a few different kinds, experience some failure, keep working at it, until you hit your stride. You’ve got this!
Now you know a few more logistics you must know in order to start beekeeping including how to think about where to put your bees, what bees need to survive, how to set up your hives, and more.
Check back in for another beekeeping lesson. Please comment below with what you’re wondering about related to beekeeping.
You’ve got this. I’m cheering you on!
This is the start of something GOOD! (I can tell!)
Subscribe to the “Dirty Fingernail Club,” follow us on Facebook, Pinterest, Instagram and YouTube
Leave a Reply